Day 2- Arduino PWM, LED Brightness Control, LED fade
Get link
Facebook
X
Pinterest
Email
Other Apps
📘 Arduino Speed up Course
Arduino Programming Training Program - Day 2
Task
1) Control LED using Push button
2) Control LED brightness using Push button
3) Control RGB LED using Push button
4) Control 12 Volt RGB LED strip using Push button
5) Generate Multiple Colors on 12 Volt LED strip
6) Control Servo Moter using Push button
7) Control Servo Motor using POT
8) Automatic Door using Arduino
9) Automatic Dustbin using Arduino
10) Anti Theft alarm uisng Arduino
Pushbuttons or switches connect two points in a circuit when you press them. This example turns on the built-in LED on pin 13 when you press the button.
Hardware
Arduino Board
Momentary button or Switch
10K ohm resistor
hook-up wires
breadboard
Circuit
Connect three wires to the board. The first two, red and black, connect to the two long vertical rows on the side of the breadboard to provide access to the 5 volt supply and ground. The third wire goes from digital pin 2 to one leg of the pushbutton. That same leg of the button connects through a pull-down resistor (here 10K ohm) to ground. The other leg of the button connects to the 5 volt supply.
When the pushbutton is open (unpressed) there is no connection between the two legs of the pushbutton, so the pin is connected to ground (through the pull-down resistor) and we read a LOW. When the button is closed (pressed), it makes a connection between its two legs, connecting the pin to 5 volts, so that we read a HIGH.
You can also wire this circuit the opposite way, with a pullup resistor keeping the input HIGH, and going LOW when the button is pressed. If so, the behavior of the sketch will be reversed, with the LED normally on and turning off when you press the button.
If you disconnect the digital I/O pin from everything, the LED may blink erratically. This is because the input is "floating" - that is, it will randomly return either HIGH or LOW. That's why you need a pull-up or pull-down resistor in the circuit.
const int buttonPin = 2; // the number of the pushbutton pin
const int ledPin = 13; // the number of the LED pin
// variables will change:
int buttonState = 0; // variable for reading the pushbutton status
void setup() {
// initialize serial communication at 9600 bits per second:
Serial.begin(9600);
}
// the loop routine runs over and over again forever:
void loop() {
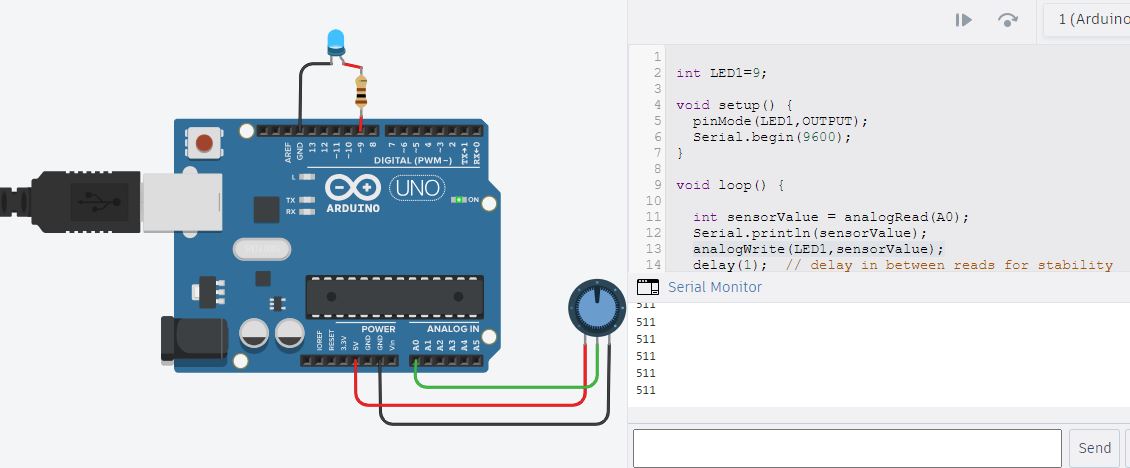
// read the input on analog pin 0:
int sensorValue = analogRead(A0);
// print out the value you read:
Serial.println(sensorValue);
delay(1); // delay in between reads for stability
}
Servo myservo; // create servo object to control a servo
int potpin = A0; // analog pin used to connect the potentiometer
int val; // variable to read the value from the analog pin
void setup() {
myservo.attach(9); // attaches the servo on pin 9 to the servo object
}
void loop() {
val = analogRead(potpin); // reads the value of the potentiometer (value between 0 and 1023)
val = map(val, 0, 1023, 0, 180); // scale it for use with the servo (value between 0 and 180)
myservo.write(val); // sets the servo position according to the scaled value
delay(15); // waits for the servo to get there
}
🌐 What is the ESP8266? The ESP8266 is a powerful, low-cost Wi-Fi microcontroller that can be used either as a standalone device or as a UART-to-Wi-Fi adapter for other microcontrollers. For example, you can connect an ESP8266 to an Arduino to add Wi-Fi capabilities to your projects. However, the most practical and efficient way to use it is as a standalone controller . With the ESP8266, you can control inputs and outputs just like an Arduino — but with built-in Wi-Fi. This allows you to bring your electronics projects online , making it perfect for IoT (Internet of Things) and home automation applications. 💡 Why is the ESP8266 So Popular? Low Cost: ESP8266 modules are extremely affordable — you can get one for around $3 or even less , depending on the model. Low Power Consumption: The ESP8266 is energy-efficient and supports deep sleep mode , allowing you to build battery-powered and energy-saving devices. Built-in Wi-Fi: The ESP8266 can: Create its o...
📘 Arduino Speed up Course Day 1 Day 2 Day 3 Day 4 Day 5 Day 6 Day 7 Day 8 Day 9 Day 10 Day 11 Day 12 Day 13 Day 14 Day 15 Day 16 Day 17 Day 18 Day 19 Day 20


Comments
Post a Comment